
-
The most important tips for preventing damage to a Chromebook!
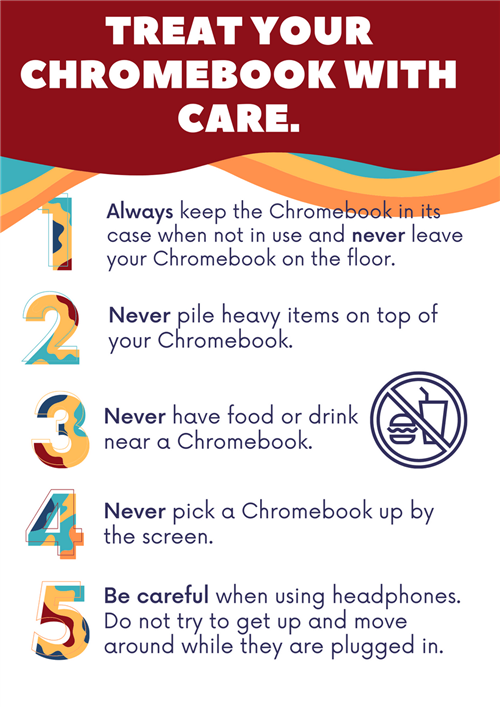
Please use basic care and your best judgement, always!
CHROMEBOOK QUESTIONS AND TIPS:
What do I do if my child is having a Chromebook issue at home?
First check this document to see if the problem is listed and try the fixes suggested. Take care to make sure you complete each step. If none of these fixes work, then get as much information about the problem as possible. Screenshots or pictures of any error messages and such can only speed up the fix process. Contact your child’s teacher and send them all the info about the problem you can and wait for further instructions.
To Take a Screenshot:
Full Screen: Hold down the Ctrl + SwitchWindowKeys
Partial Screen: Ctrl + Shift + SwitchWindowKeys
What if the Chromebook is physically broken?
If a student’s Chromebook has broken parts such as a cracked screen, broken keys, or any other physical damage, notify your child’s teacher as soon as possible and the teacher should then notify the School’s Tech in a ticket with a description of the damage.
How to Connect Chromebook to Home WIFI
1. Click on the clock in the lower right hand corner.
Choose the wireless option. This will bring up a list of available connections.
Choose the desired wifi connection. This is most likely the one for your home or location.
If your wifi is secured, it may ask for the password. The password is the one set up for your home wifi connection. We can not assist you in finding this if you have forgotten it. If you have problems connecting, you may need to contact your internet service provider. Once the password has been entered, if prompted you should be good to go.
Child is getting a “Your Browser is not Supported Message” on their Chromebook when trying to access I-Ready and other software.
This is almost always caused by a Chromebook that has not had a chance to update in a long time. This will probably be a regular occurrence at the beginning, since some of the Chromebooks handed out haven’t been used in quite a while. The fix, though, is simple. (Please note the Chromebook must be connected to Wifi to fix this.)
-
Your child should login to their Chromebook and open the Chrome Browser
-
He/she should click on the three dots in the upper right corner of the browser window and choose settings. (NOTE: If the three dots are missing and instead you see a red circle with an arrow pointing up then that means an update has already been downloaded and the Chromebook just needs to be restarted. You can click that red circle and choose restart to update.)
Then he/she should look for “About Chrome” and click on it. It will either be at the very top (if it is really out of date) or if it is just a little out of date, you should see a large blue bar at the top with the word “settings” and three lines next to it.
Click on “settings” and a small menu should show up with “About Chrome” at the bottom.
This will take him/her to a screen where it will automatically start checking for any updates and install them. When done, a restart button will appear. The student should then click the restart button to complete the update.
My child is unable to login to _________.
First, verify to the best of your ability that the student is both using the correct username and password and that they are typing it in correctly.
Next, try logging in as the student to see if you can replicate the problem. If the login is not successful please note the message given. Such as, “disabled due to intruder detected” or “Incorrect User ID or Password” and notify your child’s teacher.
The image on the screen is too large or too small:
First, try holding down the ctrl and shift keys on the left side of the key board. While holding them down tap the “0” key.
Second, try holding down the ctrl key and pressing the “0” key.
Last, try the best you can to navigate the pointer down to the clock and click on it. Then look for “Accessibility” and click on it. If any of these settings have a check mark next to it, uncheck them by clicking on them. This will deactivate the screen magnifier and other unnecessary settings.
The Chromebook is talking:
Navigate the pointer down to the clock and click on it. Then look for the “Accessibility” and click on it. If any of these settings have a check mark next to it, uncheck them by clicking on them. This will deactivate ChromeVox, Select-to-Speak, and Dictation, which will all cause the Chromebook to speak. Shortcut to enable/disable ChromeVox is Ctrl+Alt+Z
The Chromebook screen is sideways or upside down:
Hold down the crtl and shift keys on the left side of the keyboard and press the refresh button — the Refresh button looks like a curving arrow and is located just above the 3 and 4 on your keyboard. Each press of the refresh key will rotate the screen 90 degrees.
The Chromebook will not turn on:
There are several possible fixes.
-
Make sure that Chromebook charger connection is getting power. A loose connection can often prevent the Chromebook from charging. There are three connection points to check. Both ends and one about half way down the cord. Usually, if the connections are good, you should see a light lit up on the charger either at the end where it plugs into the Chromebook or in the large section half way down the charger (aka the power brick).
-
Close the Chromebook and plug it into the charger. Wait about 10 seconds and open the Chromebook back up while it is still plugged in, wait about 15 seconds and don’t press any buttons. Watch the screen closely and see if it flickers or starts to turn on.
-
Try performing a power reset. While plugged into the charger, press and hold the refresh key and then press the power button to perform a power reset. Note what the charging light is doing. Is it on, off, blinking, etc…. If the power reset works, then the moment you press the power key the charging light should blink once and the Chromebook should turn on after about 15 seconds.
-
If still no luck, allow the chromebook to charge for about 30 minutes and repeat steps 1 -3. If none of these work, please notify your child’s teacher of the issue.
The Chromebook only works while plugged into the charger:
-
Look on the screen near the clock and verify whether or not they see a battery icon displayed there. If so, go to step 2. If not, just let your child’s teacher know and feel free in the mean time to continue using the chromebook while plugged in. I do recommend, just for safety reasons, that if not in use, unplug the chromebook if it is having this issue.
-
If the battery icon is there, click on it. This will open up a small panel. In that panel should be the battery percentage and beside it an estimated time until fully charged. If an estimated time is listed the chromebook most likely just needs to be charged and this lets you know approximately how long till it is fully charged. If a time isn’t listed or it is stuck at 1% then this indicates the battery is no longer any good. Please notify your child’s teacher and, in the mean time to continue using the chromebook while plugged in. I do recommend, just for safety reasons, that if not in use, unplug the chromebook if it is having this issue.
We don’t hear any sound:
First verify that the volume setting is all the way up and not muted by clicking on the clock. Then look for the volume indicator and make sure the speaker icon is not crossed out. If so, click on it to unmute it. Then look at the volume level indicator to make sure it is indicating the volume is up. The further right the slider the higher the volume.
Can not hear anyone talking during a google meet.
Click on the lock to the left of the web address while on the Google Meet. This will make a menu pop up. At the bottom of the menu is the sound permissions. Make sure this is set to “automatic”. If you are unable to these sound settings, you may need to adjust the resolution of the screen. The quickest way to do this is to hold down the Ctrl and shift key at the same time. While holding them down, tap the “-” key. This will reduce the resolution to the point you should just be able to see it. See screenshot on the following page.
We can not see anyone's video feed/cameras during a Google Meet.
Click on the three dots in the lower right corner of the Google Meet. Then click on “settings” at the bottom. This will open another window. Click on “Video” on the left-hand side. Make sure the “Receive Resolution” is set to “Auto”.
The sound works on the chromebook, but not when using headphones or vice versa.
Sometimes, when using a chromebook, the sound stops automatically switching when the headphones are plugged in or unplugged. While a complete fix requires wiping and restoring the chromebook (which should not be attempted by you as it requires some passwords that can not be shared), the quick fix will work, but requires you or your child to manually switch the sound output setting. To do this, click on the clock and look for the volume slider bar. If the chromebook senses that headphones are plugged in, you will see a small picture of headphones to the right of the volume slider bar. Click on it and the choices for microphone and speakers will be shown. Click on “Speaker(Internal)” to use the built-in chromebook speakers or click on “Headphones” to use the headphones for listening to sound.
Website doesn’t seem to want to load.
Sometimes a site will not load properly. Most of the time, this can be fixed by simply clearing what is called the cookies and cache from the browser. To do this, simply click on the three dots in the upper right corner.
Click on More Tools.
Then click on Clear Browsing Data. Make sure that the time range is set to “All Time”. Then check the boxes that say “Cookies and other site data” and “Cached images and files” and click the “Clear Data” button.
Once it appears to be done I recommend signing out of the chromebook and back in and then try accessing the site you were having problems with again.
Keyboard is typing strange letters:
Students often accidentally change the keyboard language on the chromebook. This may be changed by clicking the notification area (bottom right, by the time). Click the Keyboard option and choose US to set it back to the standard US language.
The Chromebook is asking for the old password:
Occasionally, this happens and even though you’ve typed in the old password, it's still not working. A prompt similar to the picture below may be present:
Simply Click the ‘Forgot your old password?’ link, then click the ‘Proceed anyway’ button. Student data is synced to the cloud so there should be no worries about losing data.
How to sign into a student ECSD Profile on a home personal computer:
Copy and paste the link below into another tab on your browser for a video tutorial:
https://www.youtube.com/watch?v=3wBi0TXlWVs or click here for the Video Tutorial
Google Meet Camera or Audio Not Working
-
Make sure the camera and microphone is allowed
First make sure the camera and microphone settings are set to allowed. Go to a Google Meet and either during or just before you join, you can click the lock icon in the address bar and check your settings. Make sure the Camera and Microphone are set to allow. If not, you can click on the drop down box and make the necessary corrections.
This method will also repair camera problems within other GSuite products such as Slides and Docs.
-
Check your Google Meet camera and audio settings.
Once in a meet. Click on the three dots in the bottom right corner and go to settings. This will open a window showing the selected sources for your audio and camera settings. Click on the Video Icon. Then make sure the camera is set to the Integrated or Built-in camera. Also, make sure your audio settings are set to the Integrated/Built-in Microphone and speakers.
-
Select a School...
Select a School
- Bellview Elementary School
- Beulah Elementary School
- Blue Angels Elementary School
- Bratt Elementary School
- Brentwood Elementary School
- Cook Elementary School
- Cordova Park Elementary School
- Ensley Elementary School
- Ferry Pass Elementary School
- Global Learning Academy
- Hellen Caro Elementary School
- Holm Elementary School
- Jim Allen Elementary
- Kingsfield Elementary School
- Lincoln Park Elementary School
- Lipscomb Elementary School
- Longleaf Elementary School
- McArthur Elementary School
- Molino Park Elementary
- Montclair Elementary School
- Myrtle Grove Elementary School
- Navy Point Elementary School
- Oakcrest Elementary School
- Pine Meadow Elementary School
- Pleasant Grove Elementary School
- Scenic Heights Elementary School
- Semmes Elementary School
- Sherwood Elementary School
- Suter Elementary School
- Warrington Elementary School
- Weis Elementary School
- West Pensacola Elementary School
- Bellview Middle School
- Beulah Middle School
- Brown-Barge Middle School
- Ernest Ward Middle School
- Ferry Pass Middle School
- Bailey Middle School
- Ransom Middle School
- Workman Middle School
- Escambia High School
- Northview High School
- Pensacola High School
- Pine Forest High School
- Tate High School
- Washington High School
- West Florida High School
- George Stone Technical College
- Beulah Academy of Science
- Byrneville Elementary
- Escambia Westgate Center
- Hope Horizon
- Success Academy
- Escambia Virtual Academy


